Dad once again rough
cut the
body
blank on the big
resaw bandsaw, then we started to see what Aislinn could handle.
The
big piece of oak was a bit much for her - it needed to be lighter for
her to control it on the tools, so we swapped processes and commenced
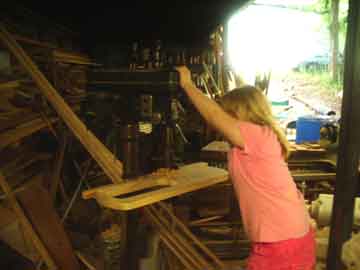
to hollowing. Cutting a 1 1/8 inch hole in cured
oak is a bit of work, and it took almost all of Aislinn's weight, but
the most she would allow is for Dad to confirm that she was drilling
each hole in the right place. "Daddy, you can hold the lyre, but
don't touch to tool". Hey, I'm a married man, I have learned to
take orders from women pretty well.
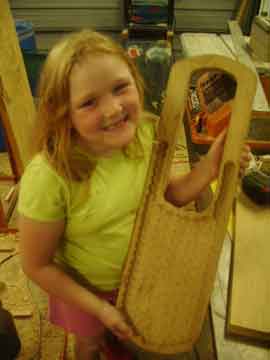
Here's
the proud hollower. Took 5 sessions of red, stinging hands, but
she got through it. Now to nice it up a bit.
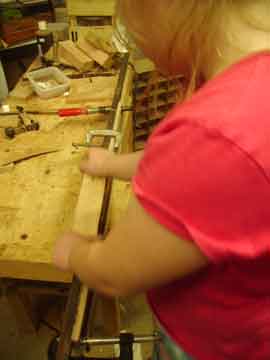
The soundboard was
made a little differently on this one -
in order to get a really good parti-color, we cut the plywood into 2
strips, sanded them to fit, dyed each one, and glued them together like
a modern guitar soundboard. Without trying to use the jointer,
the problem was how to get a good joint with the tools Aislinn could
use. So we clamped a piece of 1" square tubing to the pair of
soundboard billets, and gave her a 12" sanding block to use to joint
the pieces. She got close, but something still wasn't
right. Well, to find another way.
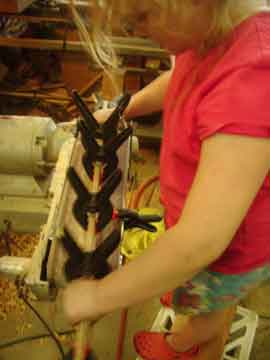
Clamping the sanding belt to the
table on my big 6x48 belt sander provided the answer. the
soundboard halves were firmly clamped together, and the whole thing was
worked back and forth by hand over the sanding table. Worked
super - only one or two very small humps needed to be sanded out by
hand for an excellent fit
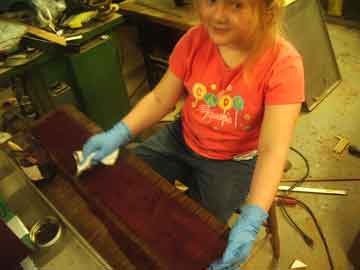
Staining one half purple (the
other half is amber), A sharpie marker gave it's life blood for
each of these dyes - isopropyl and sharpie make great dyes, and in
almost any color you can imagine. She likes the colorful part
best, I think.
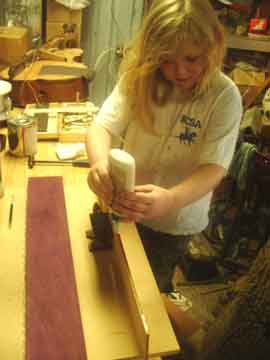
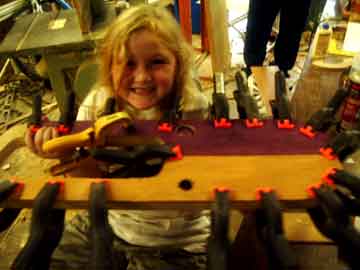
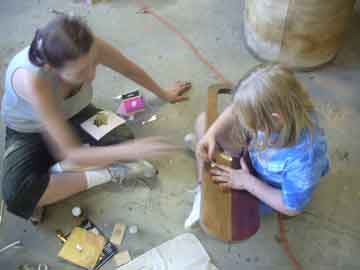
Applying the glue to join the soundboard - a comedy of errors, a flood
of tears, but finally it was done and without Dad taking over.
The jig for joining the soundboard I learned about on DIY network's
Handmade Music. A row of panel nails is driven into a board
(about 1 inch spacing). One piece is layed against the nail
(non-jointed edge) the other is placed against it (jointed edges
together) and a line is drawn along the opposite edge. Then
another row of nails is driven just inside this line - this makes the
boards 'peak' when they are layed into the fixture. A bit of
downward pressure forces the edges together better than any clamp
arrangement. Good thing Titebond is water-cleanable, she likes to
use a lot of glue!
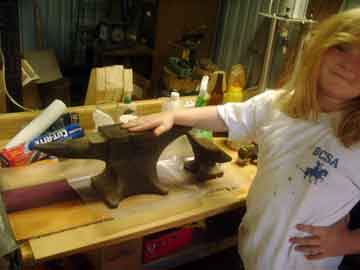
The good old Acme Anvil Company came through for the soundboard
weight. Once she was convinced that we could get the extra glue
off, she was very happy. Now only hoping she has the patience to
let it dry - two hours is almost a lifetime to a six year old girl who
is missing 'The Fairly Oddparents'
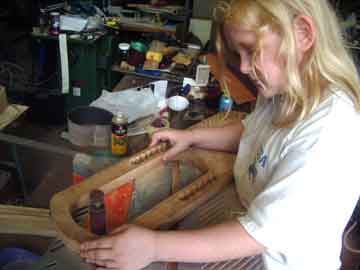
I cut the rabbet for the rear tuning peg
reinforcement, and cut the rough plate that would go in the
rabbet. To make the joint nice and tight, we returned to our old
friend the emeory cloth block, and she sanded until the gaps went
away. Then we glued.
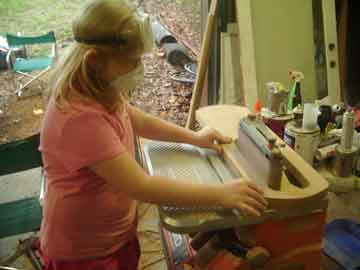
Now for cleaning up and making the tuning head area look nice.
Using the single spindle on the oscillator gave her the control she
needed inside the handhole. She likes using this tool - it
doesn't make as much noise as most of the tools in the shop.
Dad again had to throw himself on the scroll saw to cut out the
soundholes, with much arguement from the daughter - but we only had one
soundboard blank, and she wasn't doing so well on the practice pieces I
set up for her. So I handled that part. She sat patiently
for the 3 minutes it took, then grabbed the soundboard and told me that
I had already done too much of her work. Now to glue. All
of our spring clamps later, and Voila!. We just built a very
happy girl.
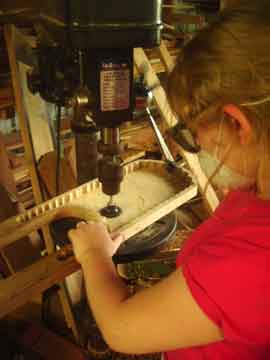
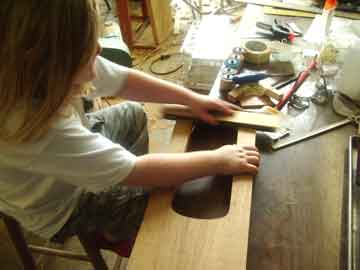
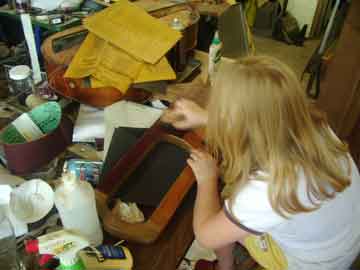
Next to clean up the soundboard
and make it look nice. Both girls are becoming real professional
at the drill press and oscillating sander. They are good power
tools to start with - they can be dangerous, but they are good
confidence builders and if you plan right, they might not be the most
efficient tools, but they can get most of any project done for you if
you are willing to get 'creative' with them.
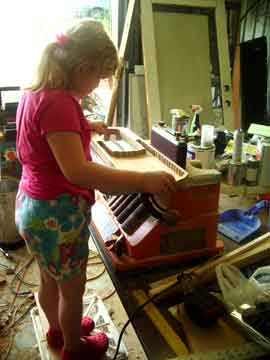
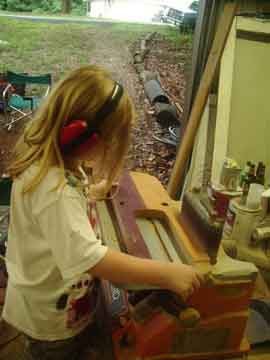
Back to the sander to clean up the front
tuning peg reinforcement. This is a quiet tool, but for some
reason Aislinn really likes wearing the orange hearing protectors -
maybe because it helps her ignore Dad, I don't know...
Just a shot of the tailpiece after it's second dip in the
lacquer. Purpleheart for the tailpiece and tailpin, padauk for
the bridge, and probably orange stained mammoth ivory or cow legbone
for the saddle.
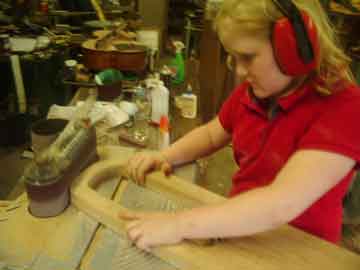
Finish sanding the lacquer on the body - the 500 grit chapter. I
have made her go from 180 to 500 to 1200 to 2000 and then finish with
0000 steel wool. Unnecessary, and the work doesn't reflect the
extra effort, but when you get people used to the fact that finishing
takes time and effort from the get-go, you are more likely to have good
finishers. The cello body under the stack of sandpaper is one of
dad's other projects, a repair of a badly, badly busted
instrument. I never thought I would end up doing this kind of
work...
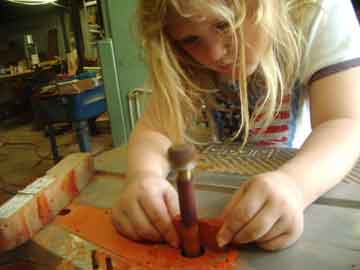
Sanding and finishing a bridge. Dad
cut a blank on the band saw (Bandsaw with no guards as a power rasp 101
will be a class at the next "Woodworking for the fingerless' seminar
coming soon to your town). The concentration is priceless - I
hope she is finally learning how to pay full attention to fine detail
work - truth is that she is having great fun making bright orange
sawdust that gets onto everything. Truth is in the perception,
don't you know. I'll stick to the 'She's learning focus'
definition. That's my story and I'm sticking to it.
A bonus lesson from another knowledgable
adult. Ceilidh and Aislinn both got basic lessons in gold-leafing
from Fionnuala, which was nice because the girls only expected to paint
metallic paint behind their soundholes in their instruments.
Again, this is an advanced skill, but the girls did good work learning
and it improved the instruments. Thanks, Fionn.
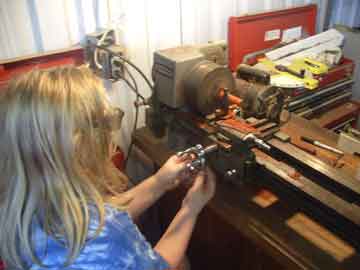
Making tuning pins on the machinist lathe. The compound slide is
set to the right angle, a depth stop is attached to the bed of the
lathe, and the crossfeed is set to read an even number on the indicator
when it is in the right position. Not really 'woodturning', but
set up so she could do it. And that's the point. 4 each
padauk and purpleheart pins (1 spare each color in case something
happens).
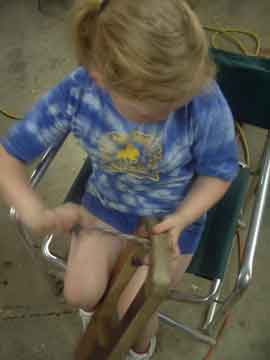
The tapered machinist hand reamer does a fine job on oak, but Aislinn
didn't quite have the hand/arm strength to turn and push cutting 1 1/4
inch oak, so dad got it close and let her finish fitting the
pins. I didn't really have any other way to make this
happen. 1 point off for dad helping - and boy, did I hear about
it (Dad, why CAN'T I do it?)
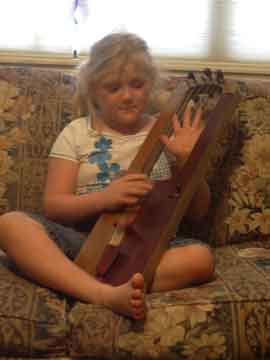
Peace and love, man. Groovy feelings
abound. Grazin' in the grass. Barefoot. I think there
is a budding folk artist in there somewhere (but I hope not, you know
how those outspoken woman folk performers are...). Next stop,
tri-levels. I am very proud of both girls, but in different ways
- Aislinn really made my day by giving full effort at her age (I
expected Ceilidh to be able to - Aislinn was a wild-card). They
have given Dad one of the best memories he will have in his whole life.

Both
girls were bugging me about maybe taking their instruments to some kind
of contest, so I decided to let them enter one of our SCA Arts and
Sciences competitions. In fact, I decided to let them enter the
biggest and most serious competition of they year - the Kingdom
Championships and Tri-Levels tournament. Of course the girls
didn't
enter the Kingdom Championship - that requires too many entries and
too much work, but the same judging and environment is used for the
Tri-Levels (judged in either novice, intermediate, or advanced).
They
both entered in novice - they had never entered a contest before.
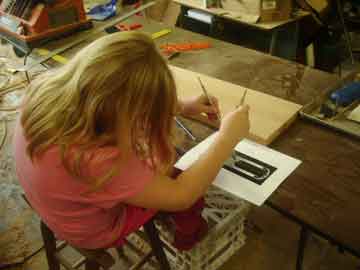
Here Aislinn is displaying her documentation before judging.
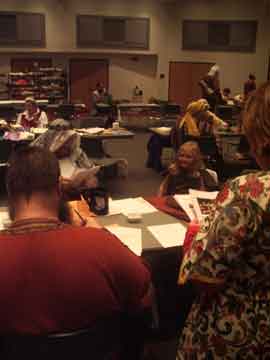
Her
judges are all recognized artisans and craftspeople in our region, and
they were VERY serious about judging. They didn't approach these
projects with any less scrutiny than they would have judged one of mine
- although they were very kid-friendly in their approach and language,
they pushed for information and didn't go easy on the girls - they made
sure the girls had an understanding of what they had built, why they
did things certain ways, they made sure the girls could justify their
entries. And the girls did fabulously - perfect scores.
Click Here for Aislinn's judging sheet
Click Here for Aislinn's comment sheet.
I am so very proud of them - they were told in no uncertain terms that
they were never to enter in novice category again! It was just
too
cool. And throughout the day they got more visits from more
people
than just about anyone else - all because everybody really thought
their projects were very worthwhile, as well as just plain neat.
 Here's a sound clip from the instrument,
with the Luthier playing.
Here's a sound clip from the instrument,
with the Luthier playing.