
After the floor tiles are secure and the adhesive has dried, remove the walls one at a time and glue them to the frame. Place a wooden square post the thickness of your tile walls into the center where the walls join. This will help keep the caulking secure.
Materials needed for this step:
1- 5/8" x 5/8" x 5 7/8" center wooden support
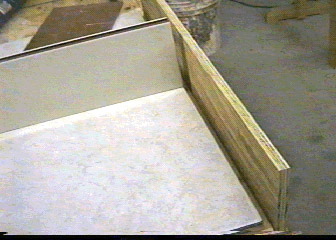
Now attach one of the box sides to the outside of the frame. This will leave a gap just large enough for a tile. Fit the other three sides in the same manner. Nail the ends of the box frame together for support.
Materials needed for this step:
Plywood 2'x4' (better than or equal to 1/4" for external frame)
deck screws
size 6 cement coated nails
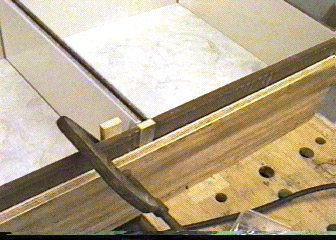
Put some adhesive on the back of the tile walls, and place them in the box. Use a small wooden spacer between the tiles in the center, and small squares of wood in each corner.
Materials needed for this step:
4- 5/8" x 5/16" x 5 7/8" center outer wooden supports
4- 5/16" x 5/16" x 5 7/8" corner outer wooden supports
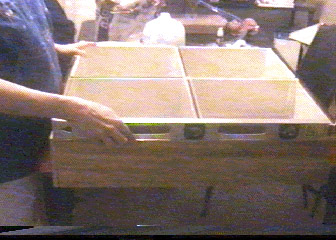
After it all dries, caulk all the seams with tub and tile caulking and let it cure. When the caulking is dry, it is time to pour the plaster. Make sure your floor is level before you pour.
Materials needed for this step:
1 tube of tub and tile caulk
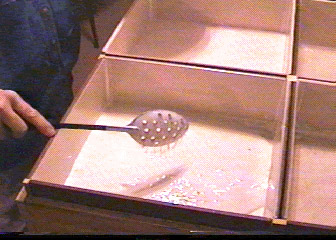
The plaster was poured in two batches in each floor. Each batch
was 6 cups of plaster of paris and 3 cups of water. Rinse your mixing
container and utensils between each batch, and be sure to pour the second
batch in each floor before the first batch sets. When the plaster dries,
you will have a completed malt floor. Go to the next page for instructions
on the use of the floor.
Materials needed for this step:
1- 25lb. bag of plaster of paris (DAP brand- make two batches per floor
using 3 cups water : 6 cups of plaster)

