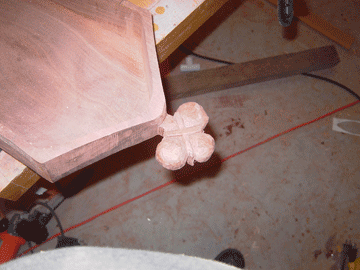
14th Century Citole
Day 4
Here it is, day 4. Thorsday. OK, so it was supposed to be
Thorsday, but it is actually Sunday. I guess I am going to start
numbering the pages by actual work-days on the citole, not on calendar
days.
As you learned on day 3, rebec #1 required some reworking, integrating
improvements that I had learned on rebec #2. So I worked Thursday
and Friday on the rebec refit, so that it could be done by Friday
evening.
The red-grained Carpathian Spruce came in on Friday. This is
supposed to be the most ideal soundboard material for small to mid
bodied instruments without lots of bracing - it is the toughest of the
spruces in lateral flex resistance - in other words you can bridge an 8
inch body with the soundboard with only 1 soundbrace and not worry
about crushing it under the bridge.
Saturday was a big demo at my daughter's school, a rainy day but I took
all the parts and my finished instruments and crossbows and stuff and
we did a pretty good demo until about 3 pm. My mother showed up
without a lot of advanced notice, bringing a whole oversized trailer of
firewood to us (yeah) for free (YEAH), and after unloading and stacking
wood and making dinner and such, I passed out in the recliner and woke
up at 3 am, just in time to move to bed and sleep till time to go to
church (no, not till time to get ready for church, but time to leave
for church.). On the way back to church to get my daughters from
catechism, a lady rear-ended my van (only cosmetic damage, but a delay)
and so the workday got started very late.
Here are the steps I have been working on so far today. It is a
good day, lots getting done, and it actually paves the way to get this
thing done in the next couple of days.
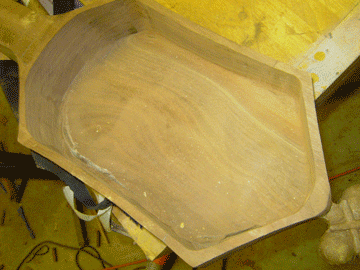
First order of business - thin the floor of the soundbox to less than
1/4 inch. Since I had already hogged out the majority of the
material with the forstner bit, it was a matter of using small planes,
scrapers, and a very sharp narrow chisel to get the floor fo the box
thinned and smoothed. It was not the easiest job, but it wasn't
overly difficult.
A final check of
the soundbox edges, and some carving on the trefoil prior to preping
and joining the soundboard. The soundboard has to be the next
part of this instrument the way I am building it - everything else is
dependant on joining or overlaying the soundboard, or pieces that do.

The Carpathian
red-grained spruce top doesn't photograph very well - it is so white
and smooth that the flash causes lots of reflections. But around
the glow you can see the even red grain lines.
The top of this instrument came from one half of a dreadnought guitar
top bookmatched pair. This leaves me 4 rebec tops from the
remaining wood.
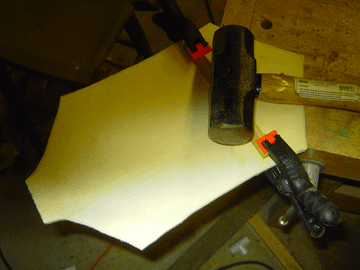
The single soundboard
brace is being glued to the top with clamps and weight. This is a
cedar brace (western red) with wide grain - very light and as
non-reactive in changing the sound quality as I can find. As the
span of this brace is less than 7.5 inches, the cedar is strong enough
in conjunction with the top to do the job.
The brace is about 1.5 inches below where the bridge will sit on the
top.
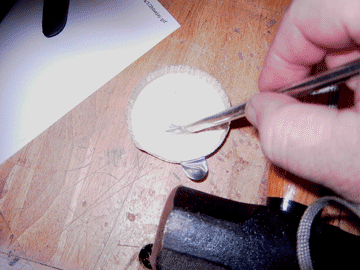
Now to join the soundboard. A home-brewed mixture of hide glue
and casein glue (both commercial prepared solids that had to be mixed
up) is used to join the soundboard. It doesn't show well here
(again the lighting conditions of the shop were wrong) but this stuff
is creamy brown like breakfast gravy, with lumps like cottage cheese in
it, during prep. Mixing with a nylon bristle brush until
everything was a nearly normal consistency was time consuming, but when
done it provided a thick, sticky glue that I think will work well.
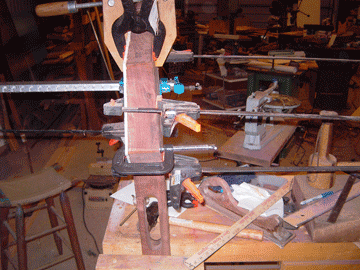
Here it is, the
frankenstein instrument. I used every type of clamp I own on this
thing - just waiting for lightning to strike and bring it to
life. It is odd - a perfectly mating set of surfaces begins to go
all whopperjawed as soon as you get a clamp on it. So a whole
bunch of clamps later, it is curing.
The top is left at 1/4 inch thickness at this point - it will be
thinned by plane after it dries - it is a perfectly flat top, and it
can be thinned after it has been clamped and stabilized. Next 2
steps are to clean up and pretty up the joint between the soundboard
and the body, to thin the top, and to prepare the neck for the
fretboard. It will go quickly from here.
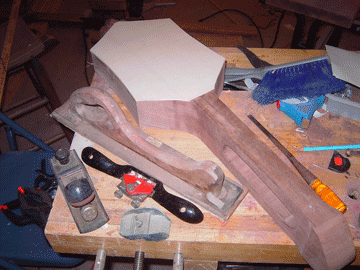
The soundboard has been trimmed and thinned on the body, and the neck
has been reduced to 1 1/2 inches wide and nicely flared into the
body. These 4 tools were used to thin and finish the soundboard -
a small handplane, a micro razor plane, a spokeshave, and an auto-body
sanding block to act like a jointer plane - just to make sure the top
is flush and smooth. The spruce cuts beautifully and this job
took very little time.
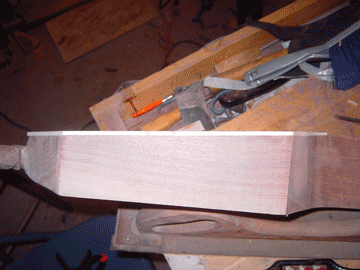
Here is the side
view of the thinned soundboard. It is just a little under 1/8
inch, and is strong enough to take good pressure. Tapping this
soundboard shows the expected zones, with the sweet spot 1 1.2 inches
back from the soundbrace, and the 'deadest' tap spot right where the
rosette will be pierced.
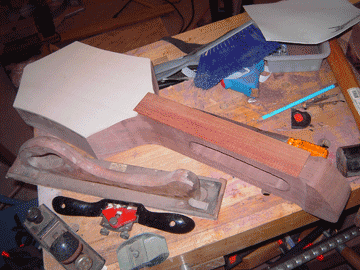
I am making a
concession to my own tastes in this part of the construction - I am
using one of the 'pink ivory' species (yellow tulipwood) as a
fretboard. This is a central american hardwood, but it is very
beautiful and I think it will go very well with the instrument in it's
finished state. At the junction of the fretboard and the
soundboard there will be small antler transition pieces - I can show no
precedence for this, but when I add the horn at the tail end of the
body to keep the tailgut from cutting into the spruce, I wanted to give
a little balance visually, and thought a small horn overlay shaped
similar to the tailpiece protector would give that balance.
Though simple, this instrument will be elegant.
Next steps are to cut and mount the frets, to finish the thumb slot, to
start the carvings on the tuning head end of the instrument, make the
tuning pegs and drill and taper the holes for them, relieve the peghead
area to properly contain the strings, and make and mount the nut, and
pierce the rosette. Tuesday should be making the bridge and
tailpiece, and that should have me on schedule for making music with
the instrument on Wednesday at the latest.
