14th Century Citole
Day 5
Here it is, work day 5. Sunday November 19.
Holidays and speedy project completion don't seem to go hand in hand,
but today I got a LOT done on the citole. It might not seem like
it, but all I have left to do to have this thing making music is to
make 6 tuning pegs, a bridge, a tailpiece, and drill and taper for the
pegs (along with notching the nut and bridge, and finishing the
rosette, which is at this point not necessary to hear how it will
probably sound).
I would like to have this thing playable in one more evening - so I can
take it and my hand carving tools and finishing supplies to visit my
Mom over the Thanksgiving weekend. I think that is a very
achievable goal, and if it is not, there is a very well equipped shop
there as well, so I should at least have it done by the weekend.
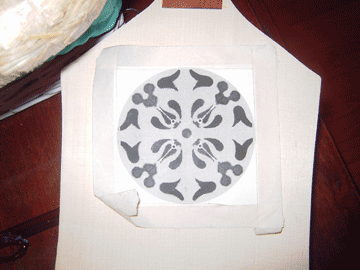
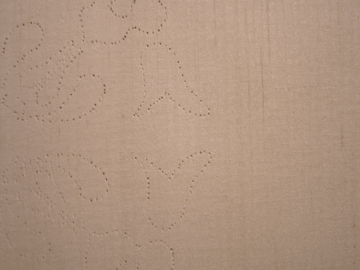
I generated a Calon Cross rosette out of geometric patterns like the
dutch 'peasant art' style that evolved into the Hex Signs common among
the settlers of Pennsylvania. Printed on a printer in black /
white, the pattern is taped to the soundboard
The design is
transferred to the soundboard with a sewing needle punched through the
pattern into the wood.
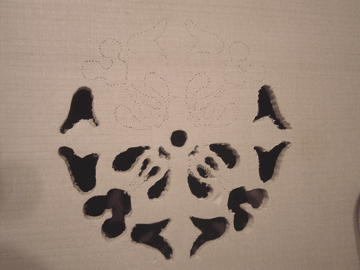
The rosette is cut
with a small piece of coarse jigsaw blade mounted in a handle, the
spruce cuts easy and the rough cutting doesn't take long, but the hand
gets tired. I got more than half of the rosette rough cut before
my fingers needed a different kind of thing to do. The rosette
will be cleaned up with small files, knives, and other abrasives.
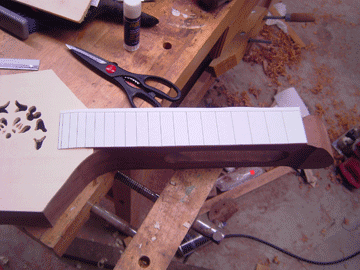
To give myself
something a break from rosette-ing, I decided to work on the
frets. Using the calculator spreadsheet I designed (see Day 2), I
generated a template on legal paper, then glued it to the fretboard
with rubber cement. I scored each fret line with a sharp blade,
and removed the template.

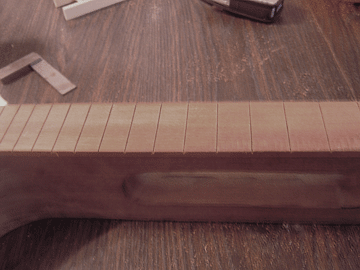
I made a hooked scraper the thickness of the frets to scrape a groove
at each fret location. This groove is centered on each fret line,
and about 1/16 inch deep.
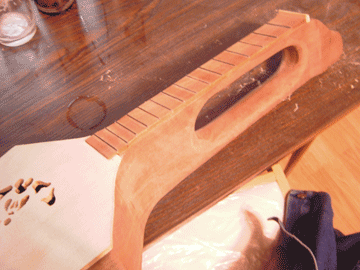
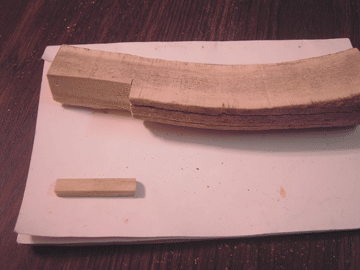
The fretboard
grooved, sanded, and ready to receive the frets. I decided to use
horn for the frets - it is a common material in the middle ages, used
on many parts of musical instruments, and it will be hard and
attractive and durable, and can be made thin so the notes are in
correct tone.
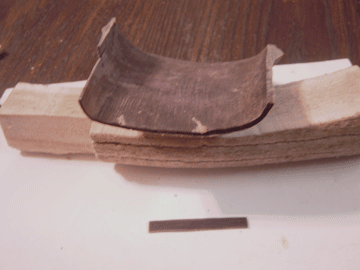
I had a large piece
of water buffalo horn, the end of which was de-laminating along natural
growth lines. I cut individual fret blanks from this horn, and
thinned them by scraping with a sharp blade until they fit tightly into
the fret notches.
Warm hide glue sticks well to the horn.
The first fret blank,
before trimming. After it dried, I trimmed it even with the sides
of the fretboard, and using a steel spacer and a fine saw, I cut the
top off at the height I desired.
An ancient piece of antler, that has provided many small pieces of horn
for projects, once again gave of itself for the nut. Using the
solid outer skin of the antler, I cut and shaped a nut. I cut the
nut so that some of the pith was left on the inside corner - so glue
would get into the pores and bind better. The nut is a little
high at this point, but a little high is better than a little low.
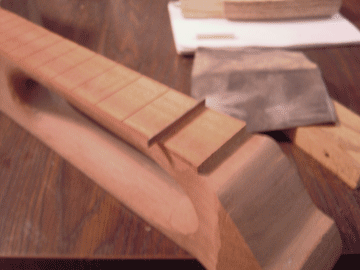
Here's the first
fret, all trimmed and ready, and the nut glued in place. Now all
that is left is 14 more frets...
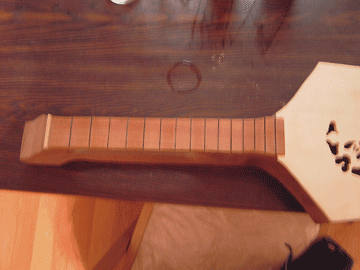
Hand-fitting all
the frets took all night, but the result is worth it. The frets
feel good, and aside from a trimming mishap on the fretboard up at fret
13, it went as well as I could have expected.
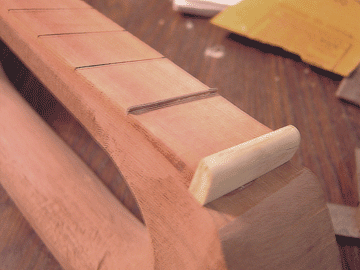
Here is a little
detail of the relieving of the thumb-slot, the rounding of that area,
and the reshaped head fo the instrument (this will allow the carving of
a falcon head and the top part of the beak more naturally than the
previous simple curve. The hard parts are done, about all that is
left are a few basic pieces and a lot of finish carving and smoothing
and oiling and...