14th Century Citole
Day 6
Here it is, work day 6. Sunday November 27.
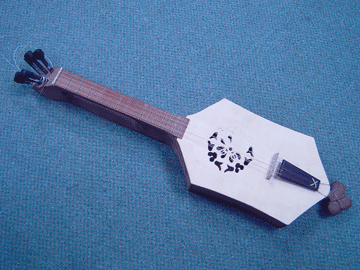
OK, the beast is strung and making music. Yeah!!! It is
strung and tuned Dd, Gg, c, f (the lowest two courses are tuned in
octave - I am not sure I am going to keep it that way, but it does
sound pretty cool). I strung it in fourths because that seems to
be the way instruments from this period were strung and tuned, in the
majority of cases that I have come across in my research.
It is far from finished - but at least I have an idea of what it will
sound like when all the adjustments are made, and it sounds good enough
that I am willing to go ahead and finish it. A moment-of-truth
situation, and the instrument passed.
Still need to do the finish smoothing on the body, the carving of the
falcon head, a new bridge (the temporary maple one is there just to get
an idea of the playability of the instrument, it will be a much
different bridge when finished), finish the rosette, add the saddle and
the other small horn embellishments, finish the trefoil, smooth and oil
finish. But now you can see the basic design of the instrument,.
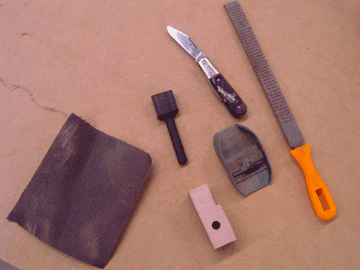
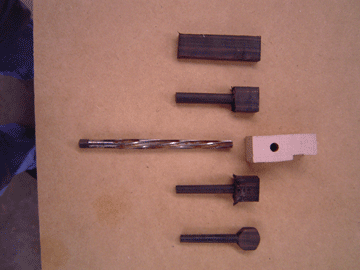
Here are the tools I used to create the ebony tuning peg shown
here. A rough cut blank, rounded with a rasp, then scraped and
sanded and planed with a sharp razor plane to fit the test block I made
out of an old scrap of maple, tapered with my tapered machinist
reamer. Trial and error to fit.
The stages of the
peg, start to finish.
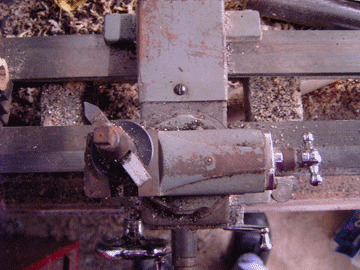
And the
secret. After cutting a peg by hand, and fitting it, (more than
an hour of work to get the kind of fit that I needed, and one wasted
ebony blank), I decided to simply turn the blanks on my metal lathe
with a compound cross-slide set to match the angle of my reamer.
More efficient, and a great fit.
Here's two pegs in the head of the instrument, the rear peg fit by hand
and the front peg turned on the lathe. Both pegs fit well, but
the second took all of 5 minutes while the first took an hour or so.
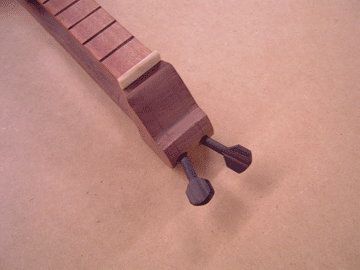
Here's the top view, showing the angle I set the pegs at to avoid
having the peg heads interfere with each other, and to allow me access
with a tourn-a-goache (sp) - the tuning wrench so necessary for wooden
peg tuning of this type.
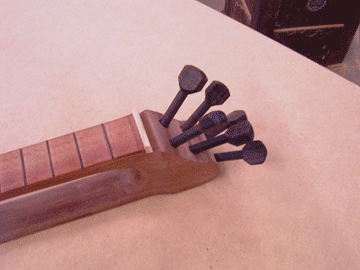
Look, mom,
antenna!!! Here's all 6 pegs in place. Time to build the
bridge and tailpiece and string this thing for the first time.
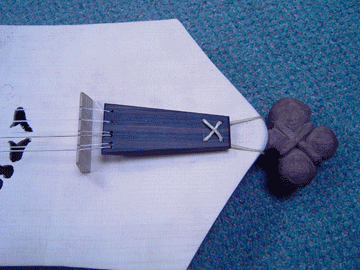
Here's the final
tailpiece and the temporary bridge. I would have had pictures
along the construction of these parts, but my camera decided to
scramble a few images. I will take a picture of the underside of
the tailpiece when I get it unstrung again. The bridge will be
completely different when finished. The solid bridge gives a
strange sound to the 5the string (3rd course). I will be fitting
a footed bridge in the end
Amazing - 6 evenings work from start to here. Goes fast when
you have a proper shop, all the materials, a little enthusiasm, lots of
caffeine and a total reckless disregard for your own safety and the
proper use of tools...<grin>.